
A Miracle Rogue deck is built around one card: the Gadgetzan Auctioneer. With its ability to allow you draw cards whenever you cast a spell, it creates a lot of opportunities as the Rogue’s mighty spells only cost a tiny amount of mana. However, as everything is centered around just one card in your deck, it has some weaknesses that you need to take into account.
During the 16th NESL King of the Hill (KOTH), a weekly series that brings the Sunday cup winner and one invited player together to face off for the chance to play the reigning champion, star player Gnimsh showed viewers both how to play with and against a Miracle Rogue deck while facing Sunday cup winner FeaRLuffy as well as reigning champion TidesofTime.
Here we review these matches in hopes of helping you get the best out of your own Miracle Rogue deck (or to help to take those pesky Rogues down).
Match 1: Gnimsh vs. Luffy
Match one was between FeaRLuffy and Gnimsh, both first timers to the KOTH tournament. However, while it was their first times in the tourney, it wasn’t their first outing in high level Hearthstone play.
Luffy has been consistently placed in the top five players in the NESL Sunday Amateur Cup, often taking top three. He is no stranger to not only playing but also winning against some high legend players. Gnimsh doesn’t need much introduction either. He’s well known in the community and has been to many Hearthstone tournaments including ESGN’s Fight Night and DreamHack Bucharest. He is known to run slightly off-the-wall cards in a seemingly normal deck, and makes use of this tactic to catch his opponents off guard. This, however, does not detract from the level of skill that Gnimsh plays with, and has shown himself to be a top tier player.
Game 1: Gnimsh Miracle Rogue vs. Luffy Control Warrior
It seemed that Luffy expected Gnimsh to save his Miracle Rogue deck as a counter pick for a later game, and chose a control deck to take advantage of that. However, Gnimsh decided to use his Miracle Rogue first, unintentionally countering Luffy’s Control Warrior.
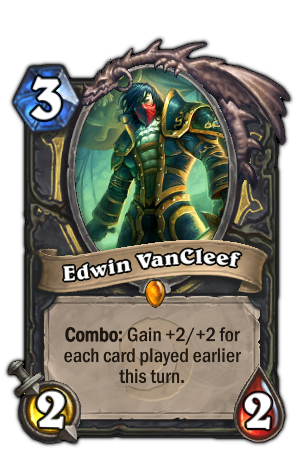
As with most Miracle Rogue matchups, Gnimsh’s only goal was to survive until he could draw his Gadgetzan Auctioneer. He did not end up drawing into his Auctioneer in the first few turns, which gave Luffy a chance to build a strong board and health advantage. However, Luffy also drew dead as many of the cards he had in his hand were situational like Brawl and Shield Slam, or late game cards such Baron Geddon. Because of this, Luffy was forced to make reactionary plays like using Shield Block and Shield Slam to get rid of Gnimsh’s Edwin VanCleef.
Turn seven rolls around and Gnimsh finally draws his Auctioneer, which he immediately played to start milling his cards. The key for Gnimsh now was to keep his Auctioneer alive, which he achieved with Shadowstep to bring it safely back to his hand and Conceal to prevent Luffy from interacting with it in any way. Warriors have few cards to deal with a stealthed Auctioneer, and their only real option – Brawl – is based entirely on RNG, so is unreliable and considered a desperation play. Luffy had to gain a big enough advantage in health and board before Gadgetzan was played so that he could stand a chance, but unfortunately Gnimsh dealt with everything Luffy played efficiently, paving the way for the unkillable Auctioneer.
Game 2: Gnimsh Miracle Rogue vs. Luffy Handlock
Luffy chose his next deck wisely, picking the one deck that is considered a hard counter to Miracle Rogue: Handlock. The Handlock’s ability to summon large, bulky creatures early in the game takes advantage of the Rogue’s weak early game as the player waits for Auctioneer, and often forces the use of powerful spells such as Eviscerate and Sap sooner. However, Luffy drew dead once again and was unable to get a playable four drop by his fourth turn, which let Gnimsh stay in the game. Gnimsh also had a trump card up his sleeve specifically for the Handlock matchup: Coldlight Oracle.

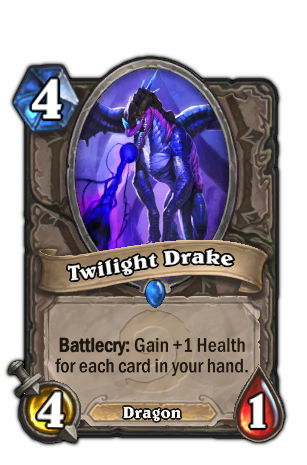
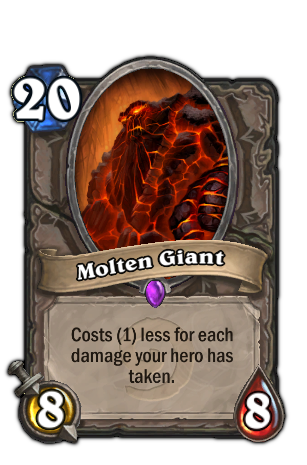
The Coldlight Oracle forces both players to draw two cards, which ruins Handlocks’ hand-size management and often leads to them discarding their next draw. This can also be comboed with cards like Sap, as Gnimsh demonstrated in this game, to easily remove big threats like Giants using only one spell. The Coldlight Oracle also shut down the Warlock’s hero ability as Luffy could not tap as it would end up discarding the draw. This not only gave Luffy a harder time drawing into key cards like Mountain Giants and Twilight Drakes but also prevented him from summoning cheap Molten Giants. Luffy’s inability to draw into or even play some of his bigger creatures gave Gnimsh the victory.
Game 3: Gnimsh Miracle Rogue vs. Luffy Shaman
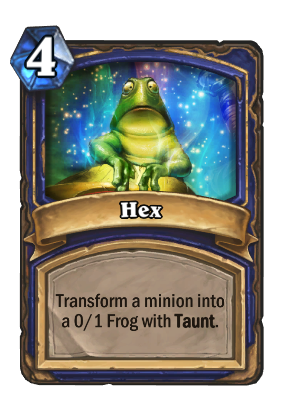
Luffy was now on the back foot with his last deck – Shaman – which is not the best against Rogues. Its lack of defensive options means it has no way to stop the huge damage output from spells and Leeroy combos, but makes up for it with some nice removal spells. Luffy showed this strength by Hexing Gnimsh’s turn four 8/8 Edwin, shutting down Gnimsh’s early aggression.
However, removal spells were not enough to face against the drawing power of a Gadgetzan Auctioneer, and Luffy quickly fell to the overwhelming card advantage Gnimsh gained. Thanks to Shadowstep and Conceal, Luffy could not use his plethora of removal spells on the one card that mattered the most, the Gadgetzan Auctioneer, and as such Gnimsh had free reign to draw as many cards as he wanted to achieve victory.
Match overview: Gnimsh vs. FeaRLuffy
Gnimsh maintained absolute control over all three matches. While Luffy did have some unlucky draws in game two, his main issue was being unable to deal with the key Auctioneer quickly. His options were also limited as Gnimsh was patient and only played Gadgetzan if he had a Shadowstep or Conceal in hand, but specifically in game two, Luffy used his AOE much too early. Shadowflaming his Watcher to clear two minions was not worth the board control as it allowed Gnimsh to play Gadetzan without the threat of Shadowflame.
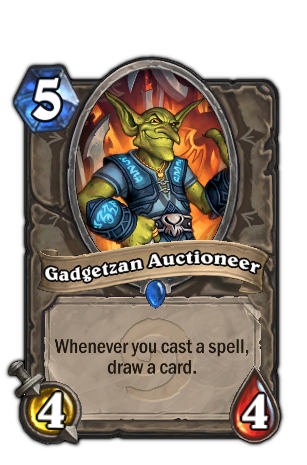
That is not to take away any of the plays that Gnimsh made, however. Gnimsh played an extremely patient match, minimizing damage and waiting for his Auctioneer draw. You could argue he got lucky with his draws, being able to draw Auctioneer in the early to mid game, but the best Miracle Rogue players are the ones who can play well leading up to the Auctioneer draw – Gnimsh is one of those. Clearing the board, getting value out of almost every play and, most importantly, keeping himself alive allowed him an easier time when the Gadgetzan Auctioneer was ultimately drawn.
Match 2: Gnimsh vs. TidesofTime
While Gnimsh and Tides have never faced off in professional play before this, they are both well-known figures in the Hearthstone community. Both are top-tier players and both are known for rather unique decks and including small tweaks to the standard meta in their builds. Tides had won the KOTH before, but had lost the following week – could he achieve what he couldn’t before and win a second title?
Game 1: Gnimsh Miracle Rogue vs. Tides Aggro Warrior
Tides started off with a ridiculous hand, having a total of 28 damage through weapons and Leeroy. Knowing that Miracle Rogues lack defensive options and have a difficult time dealing with aggro, Tides decided to go for a frontal assault, dealing 12 damage over five turns with Fiery War Axes.
Luckily, Gnimsh had a Gadgetzan in his starting hand, and drew into both Preparations. This meant that when turn five came around, Gnimsh was able to draw some cards and Conceal his Auctioneer, giving him the card advantage and, most importantly, keep his Auctioneer alive. Tides had the right idea with the full-on aggro rush strategy, but Gnimsh had gotten out an early Auctioneer which slowed Tides’s aggression to a screeching halt and ultimately lost him the game.
Game 2: Gnimsh Miracle Rogue vs. Tides Miracle Rogue
Tides decided to pull out the mirror match in hopes of finally ending Gnimsh’s undefeated streak. In the mirror match, keeping board control is essential as less threats on board means less direct damage and more time for the Auctioneer to draw cards. It’s also a battle of keeping Auctioneer in play longer than your opponent – whoever can get more value from their Auctioneer draws will win the game.
Tides was able to secure a Gadgetzan in his starting hand and showed a rare Novice Engineer on turn two for some extra card draw. Tides was able to play the first Auctioneer of the game but the results were less than ideal, and without drawing Conceal and deciding against using a Shadowstep to return the Auctioneer to hand, it gave Gnimsh the chance to remove it on his play.
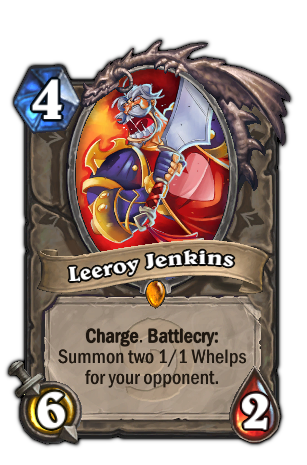
Tides was forced to play his second Auctioneer to keep drawing for answers, specifically Leeroy, but Gnimsh played his own in return and Sapped Tides’s Gadgetzan back to his hand. Tides was able to clear the board with a Azure Drake-buffed Blade Flurry and topdecked an Earthen Ring Farseer to get back some health. Gnimsh played his second Auctioneer and was also able to clear Tides’s board but the Auctioneer draws made him take three fatigue damage and not enough mana play his Leeroy to end the game. Tides had to take the gamble and played his Bloodmage and Backstabbed it, hoping to draw his Leeroy. The RNG gods smiled down on him and blessed him with the Leeroy topdeck to win the game.
Game 3: Gnimsh Handlock vs. Tides Miracle Rogue
Gnimsh pulled out the counter pick to stop Tides’s Rogue shenanigans. The Handlock’s ability to get huge minions early in the game take advantages of the Rogue’s limited options and forces early spell usage, which means less Auctioneer draws. As is standard fare for Handlocks, Gnimsh simply tapped until turn four when he played a 4/9 Twlight Drake to start the early game pressure.
Gnimsh followed up by taunting the Drake and Copying it with Faceless Manipulator, forcing Tides to play early spells to stay alive. Tides was able to pull out an Auctioneer and draw some cards, but it was too late as Gnimsh was able to build a powerful board with Molten Giants to follow his fallen Drakes. Tides could not draw the much-needed Saps and thus could not remove the Giants from the field, ending with his loss.
Game 4: Gnimsh Handlock vs. Tides Lavaburst Shaman
The second Shaman of this mini tournament, and one that, coincidentally, is considered a counter to Handlock. The cheap removal helps get rid of Giants and Drakes while the huge burst from Al’akir, Rockbiter Weapons and Flametounge Totems allow the Shaman to kill the Warlock before his health is in range of cheap Molten Giants. The key to the game was board advantage – if Tides could keep the big minions off the board, he could use his damage to one-shot the Warlock, but if Gnimsh got control, Tides would be overwhelmed by the Giants and Drake.
Gnimsh attempted to flood the board with a continual flow of huge minions to try and force Tides to use all of his removal early to make way for the Giants, but whenever he put up a big minion, Tides was able to efficiently trade and keep board advantage. Tides was able to protect himself and his minions with Feral Spirits and use Flametounge Totem to trade weaker creatures with much bigger and expensive ones. Thanks to the burst from Flametounge and Rockbiter, Tides was able to keep Gnimsh at a high enough life total that he could not combo Molten Giants into taunts and still win the game.
Game 5: Gnimsh Sunshine Hunter vs. Tides Lavaburst Shaman
It came down to this, the fifth and final game. Gnimsh picked well, as Hunters, while unpopular in the current meta, are seen as Shaman counters, especially the trap-heavy Sunshine Hunter. The amount of tokens Shaman have in their decks, namely totems, allow for big Unleash the Hounds (UTH) combos. Also, the lack of defensive options for Shamans allow the Hunter’s continual direct damage to have a lasting effect and unavoidable effect. This does not mean that the Shaman has no options, as they too have the possibility for a large amount of burst as previously stated, and Hunters have just as few options as Shamans when it comes to healing or defensive plays.

Tides chose to play aggressively, knowing that as soon as he fell behind there was little chance for him to come back. This aggression paid off as Gnimsh made a costly mistake in turn five by playing directly into Tides’s Lightning Storm, giving Tides room to breathe. Gnimsh was forced to use his Kill Commands early as removal to try and gain board control, which left Tides more confident in his plays as he knew Gnimsh was down a possible ten damage from those spells.
Tides played smart as well, keeping his minion count low until he was close to lethal, minimizing the damage from an UTH combo. Unfortunately for Gnimsh, he was unable to draw his UTH at the right time, allowing Tides to set up and keep a solid board advantage and maintain his aggression. This proved fatal as a combination of Rockbiter Weapon and Lightning Bolts won Tides the game.
Match overview: Gnimsh vs. TidesofTime
All the games were very close, and both players displayed the sheer amount of skill they had not only in deck building but also in playing the game. While Tides achieved victory, it could have gone to Gnimsh just as easily. Watching a Shaman deck win Tides the match was entertaining to see, and also proved that yes, Shaman is a viable class, opening up new insights into the evolving meta.
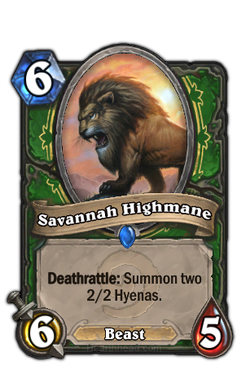
At the end, it really came down to small mistakes and topdecks for the victory. A few plays in particular that Gnimsh made really secured the win for Tides in the final game. From the first turn, Gnimsh arguably made a mistake by choosing Hunter’s Mark over Savannah Highmane. True, if he had drawn UTH during the game, it would have been a nice card to have, but the value from Savannah Highmane cannot be overlooked. If anything, it can use up one of the Shaman removal spells, opening up opportunities for other minions to play. Gnimsh also used his Kill Commands too early, in my opinion. Kill Command is one of the most powerful threats in a Hunter deck, deterring many aggressive plays by the opponent in fear of that removal, but when Gnimsh threw both out so quickly, Tides had no issue summoning key creatures such as Fire Elemental.
His choice to play around Hex instead of Lightning Storm during his fifth turn may have been the turning point of the match. Yes, he had to make a hard decision as to which card to play around, but weighing his options playing around Lightning Storm and trading his two minions was, in my opinion, a better play. Not only was he forcing a Hex on a lower priority target, but that meant Tides was less likely to be able to Hex Gnimsh’s Highmanes. Because of the snowbally nature of many of the decks in the meta, especially Shaman, small decisions like that can really decide the outcome of the match.
It just goes to show you that you must be thinking not only about the following two turns, but also the flow of the game overall when making decisions, because any single one of those choices could lead to victory – or defeat.
If you’re hungry for more Hearthstone, why not check out last month’s Hearthstone news roundup or take part in one of our weekly Hearthstone cups?